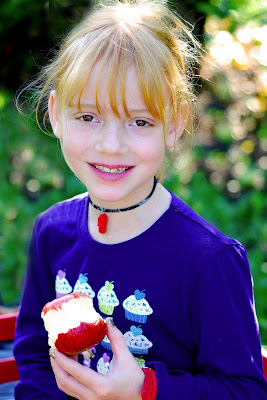
Today, I will introduce you to the wonder of the clone stamp tool. This is a picture of my daughter that I really liked, except for that pesky ghosly apparition of my son in the background.
Enter the clone stamp tool. This is a really easy, and fun tool to use in Photoshop. Definitely something a beginning beginner can do with ease.
Open the photo you want to edit. Go into full edit mode. Click on the clone stamp tool. In my Photoshop Elements, Six, it is the eighth icon down on the left hand side of the tool bar. It looks like an "M" shaped stamper. Then go up to the brush selector at the top of the page on the lefthand side (it is a black squiggly line) and chose the size brush you want to use by either moving the slider or entering numbers into the box. I am going to be honest here and tell you that I have no patience. Because of this, I always choose a brush that is way too big and wind up doing alot of "undoing" when I work. Don't be like me.
Now, pick a spot in your picture as close as possible to the object you want to erase. You want to do this in order to seamlessly blend the new area you are about to create with the existing area. After you have chosen your spot, Alt Click on your mouse. By doing so, you have told Photoshop that you want the spots you are deleting in your photograph to look like the area on which you just alt clicked.
Now comes the fun part - click away on the object you want to erase. As you do so, the object will disappear and be replaced with the parts of the picture on which you previously alt clicked. Caution: as you move the cursor around your picture, be aware of the plus sign that moves along with it. The plus is continuously sampling your photograph and using the samples to replace your unwanted object. Keep an eye on it and make sure it is sampling from the correct area(s). I have wound up with a child with three arms and an eye in the middle of their forehead more than I care to admit!
Here is my picture after using the clone stamp tool:

Ahhh.....much better. And my daughter no longer feels haunted by her little brother.
This is such a fun tool. Have fun!
And remember, if I can do it, you can do it!
Love, -40


No comments:
Post a Comment